This hand-kneaded sandwich bread is soft, fluffy, and perfect for making delicious sandwiches or toast. With simple ingredients and straightforward techniques, you can create a homemade loaf that rivals store-bought options.
The recipe emphasizes the traditional method of kneading by hand, allowing you to develop the dough’s gluten for a perfect texture. It’s an excellent way to enjoy the satisfaction of baking from scratch.
Homemade Hand-Kneaded Sandwich Bread
Creating your own sandwich bread at home offers a rewarding experience that goes beyond just the taste. This hand-kneaded loaf is characterized by its soft crust and fluffy interior, making it an ideal choice for sandwiches or toast. The process involves simple ingredients that you likely already have in your kitchen.
To start, gather all-purpose flour, instant yeast, sugar, salt, warm water, and optionally, some melted butter. These elements come together to form a dough that, once kneaded and baked, transforms into a delightful loaf. The hands-on approach of kneading the dough allows for better gluten development, resulting in a texture that is both light and airy.
The Kneading Process
Kneading is a fundamental step in bread-making that significantly impacts the final product. By working the dough by hand for about 10-15 minutes, you create a smooth and elastic texture. This physical engagement not only helps to develop the gluten but also connects you to the art of baking.
After mixing the dry ingredients and adding the warm water, the dough will initially appear shaggy. This is perfectly normal! As you knead, the dough will come together, and you’ll feel it becoming more cohesive and springy. The satisfaction of transforming a simple mixture into a pliable dough is a highlight of the baking process.
Rising to Perfection
Once kneaded, the dough needs time to rise. Place it in a greased bowl, cover it with a damp cloth, and let it rest in a warm environment. This first rise typically takes about an hour, allowing the dough to double in size. This step is crucial for developing flavor and texture.
After the first rise, gently punch down the dough to release any trapped air. This is followed by shaping the loaf, which involves flattening the dough into a rectangle and rolling it tightly. The shaping process not only gives the loaf its final form but also helps to create a uniform crumb structure.
Baking the Bread
With the loaf shaped, it’s time for the second rise. Placing it in a greased loaf pan, cover it again and let it rise until it has risen above the rim of the pan. This final rise is essential for achieving that perfect height and soft texture.
Preheat your oven to 350°F (175°C) while the dough is rising. Baking the bread for 30-35 minutes will yield a golden brown crust that sounds hollow when tapped on the bottom. This auditory cue is a classic sign that your bread is perfectly baked.
Cooling and Slicing
Once baked, allow the bread to cool in the pan for about 10 minutes before transferring it to a wire rack. This cooling period is important, as it helps the bread set and makes slicing easier. The aroma of freshly baked bread filling your kitchen is an experience in itself.
When you’re ready to slice, you’ll be greeted by a soft, fluffy interior that is perfect for any sandwich filling or simply enjoying with butter. Each slice showcases the beautiful texture and color of your homemade creation.
Enjoying Your Homemade Bread
This hand-kneaded sandwich bread is not just a staple for sandwiches; it can also be enjoyed toasted with a spread of your choice. The versatility of this loaf makes it a fantastic addition to any meal. Whether you’re making a classic peanut butter and jelly sandwich or a gourmet grilled cheese, this bread will elevate your culinary creations.
With a little time and effort, you can enjoy the satisfaction of baking your own bread, bringing warmth and comfort to your kitchen. The process may take a few hours, but the end result is a delicious loaf that is well worth the wait.
Homemade Hand-Kneaded Sandwich Bread
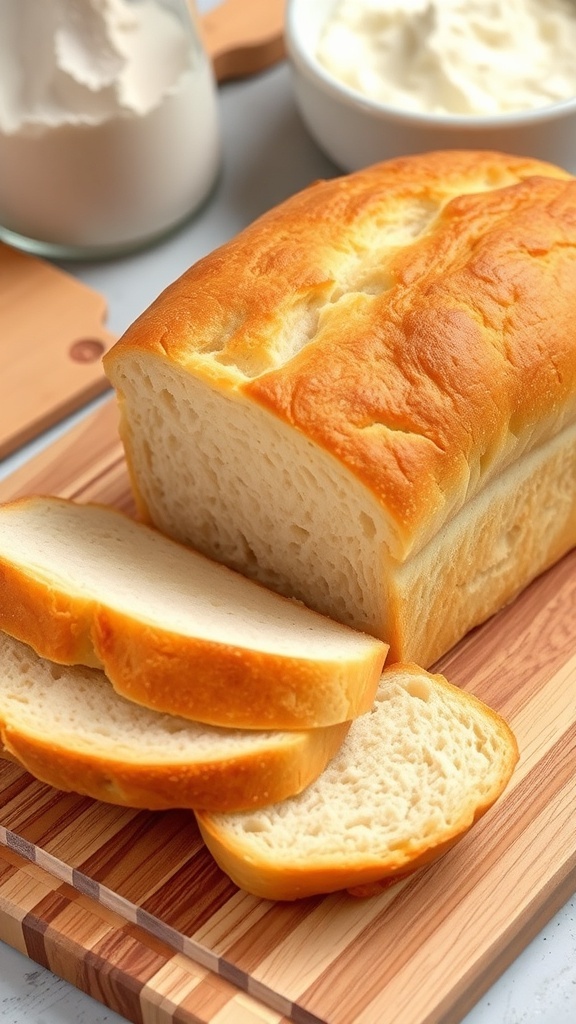
This sandwich bread is made with all-purpose flour, yeast, water, and a touch of sugar and salt. The process takes about 3 hours from start to finish, including rising time, and yields one loaf that serves approximately 10 slices.
Ingredients
- 4 cups all-purpose flour
- 2 teaspoons instant yeast
- 2 tablespoons sugar
- 1 teaspoon salt
- 1 1/2 cups warm water (110°F/43°C)
- 2 tablespoons unsalted butter, melted (optional)
Instructions
- Mix Dry Ingredients: In a large bowl, combine the flour, yeast, sugar, and salt.
- Add Water: Pour in the warm water and melted butter (if using). Stir with a wooden spoon until a shaggy dough forms.
- Knead the Dough: Transfer the dough to a lightly floured surface. Knead by hand for about 10-15 minutes until the dough is smooth and elastic.
- First Rise: Place the kneaded dough in a greased bowl, cover with a damp cloth, and let it rise in a warm place for about 1 hour, or until doubled in size.
- Shape the Loaf: Punch down the risen dough, then turn it out onto a floured surface. Shape it into a loaf by flattening it into a rectangle and rolling it tightly.
- Second Rise: Place the shaped loaf into a greased 9×5-inch loaf pan. Cover and let it rise for another 30-45 minutes until it has risen above the rim of the pan.
- Preheat Oven: Preheat your oven to 350°F (175°C).
- Bake: Bake the bread in the preheated oven for 30-35 minutes, or until golden brown and sounds hollow when tapped on the bottom.
- Cool: Remove the bread from the oven and let it cool in the pan for 10 minutes before transferring it to a wire rack to cool completely.
Cook and Prep Times
- Prep Time: 20 minutes
- Rise Time: 1 hour + 30-45 minutes
- Bake Time: 30-35 minutes
- Total Time: 3 hours
- Servings: 10 slices
- Calories: 120kcal
- Fat: 2g
- Protein: 4g
- Carbohydrates: 22g