I’ve always loved wrapping gifts, but let’s be honest—it can get messy fast. Between the rolls of paper, ribbons, and tape that seem to vanish when you need them most, it’s easy to feel overwhelmed. That’s when I realized the magic of having a dedicated gift wrapping station. It’s a total game-changer, keeping everything organized and making the whole process way more enjoyable.
Choose the Right Location for Your DIY Gift Wrapping Station
Picking the perfect spot for your gift wrapping station makes all the difference. It should be practical and fit seamlessly into your home.
Evaluate Available Space in Your Home
Measure unused corners, closet shelves, or even a spare table. If you’re short on space, think creatively—an over-the-door organizer or a rolling cart can save the day. I’ve transformed a tiny nook in my living room into a functional setup, so don’t overlook unconventional spots.
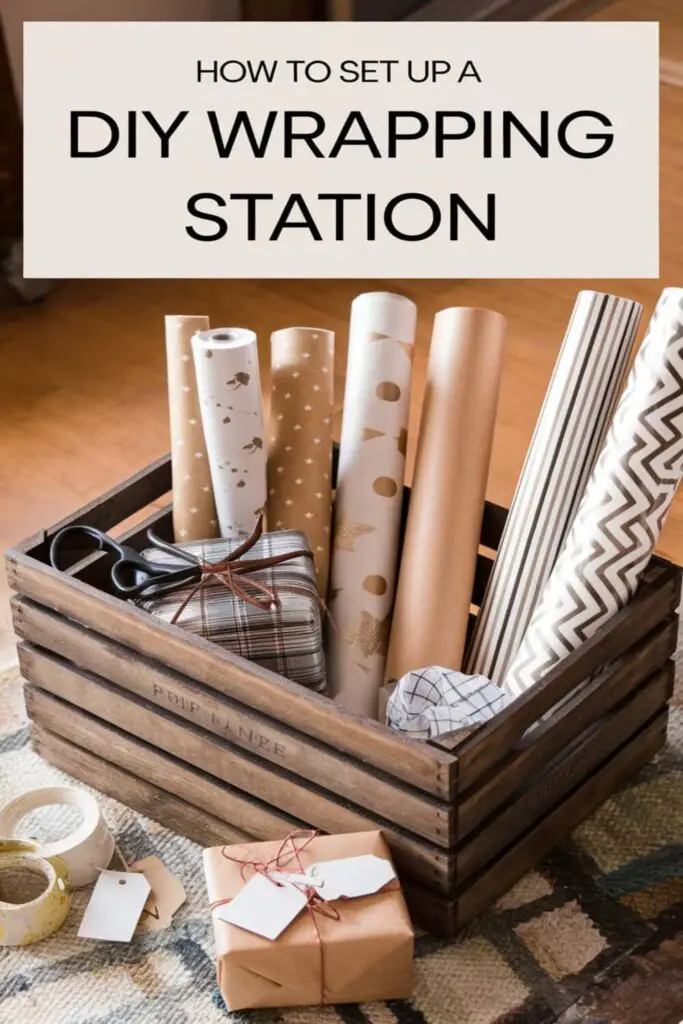
Gather Essential Wrapping Supplies
Once you’ve picked the perfect spot, it’s time to gather all the key items you’ll need for seamless gift wrapping. Having everything in one place makes the process way more enjoyable.
Stock Up on Wrapping Paper, Ribbons, and Bows
I make sure to have a variety of wrapping paper for every occasion—birthdays, holidays, or just-because gifts. Rolls are great for big presents, while sheets work for smaller ones. Ribbons and bows add that extra flair, so I keep a mix of colors and textures handy. For a pro tip, I roll ribbons around spools to keep them neat!
Include Scissors, Tape, and Other Tools
Good scissors are non-negotiable for cutting clean edges. I also grab a couple of rolls of tape (both regular and double-sided for a seamless look). If you want to get fancy, a gift-wrap cutter or tape dispenser can speed things up. For awkwardly shaped gifts, I like to keep a small stash of gift bags too.
Organize Your Supplies for Efficiency
Setting up a gift wrapping station isn’t just about having the right tools—keeping everything organized makes the process so much easier. Here’s how I keep my supplies efficient and tidy:
Use Storage Bins and Containers
I rely on clear storage bins and containers to keep my supplies in order. Transparent bins make it easy to see what’s inside without digging through a pile. I use smaller bins for things like ribbons, bows, and tags and larger ones for wrapping paper rolls. For long rolls, I’ve found that tall, plastic storage containers or laundry baskets work perfectly.
Categorize by Type and Color
Grouping items by type and color saves time when I’m wrapping gifts. I keep holiday wrapping paper in one bin, birthday paper in another, and even separate neutral designs for year-round use. For ribbons and bows, I like to sort them by color family so I can quickly match the perfect accent for each gift.
Arrange Items for Easy Reach and Use
I organize my station so everything I need is easily accessible while I work. I keep heavy-duty scissors, tape, and pens in a desktop caddy or hanging organizer. Wrapping paper rolls go upright in a corner of the station, while ribbons and tags are on hooks or in shallow drawers. It’s all about setting things up so I don’t waste time searching for essentials.
Set Up a Dedicated Work Surface
Having a proper work surface is crucial for an efficient gift wrapping station. It keeps everything organized and helps me focus on creating those beautifully wrapped presents.
Select a Sturdy Table or Desk
I choose a table or desk that’s large enough to hold wrapping paper, tools, and gifts without feeling cramped. A sturdy surface prevents wobbling while I work on precise folds or cutting paper. If possible, I try to repurpose an old desk or a folding table—something durable and easy to clean.
Add a Comfortable Chair or Stool
I make sure to grab a chair or stool that’s the right height for my table. Wrapping gifts can take time, so having a comfortable seat saves me from backaches. I also pick one with cushioning or lumbar support if I know I’ll be wrapping for long sessions.
Ensure Adequate Lighting for Precision
Good lighting makes a huge difference, especially when I’m working late or handling small details like tags or bows. I set up near a window for natural light during the day and add a desk lamp or clip-on light for evenings. Bright, even light helps me avoid mistakes like cutting too short or misaligning ribbons.
Create a Wrapping Inspiration Board
A wrapping inspiration board can make all the difference when it comes to sparking creativity and staying organized. I love having a visual reference that keeps my ideas flowing and my wrapping cohesive.
Pin Up Creative Wrapping Ideas
I pin up photos of beautifully wrapped gifts to inspire my designs. Magazine cutouts, Pinterest printouts, or even snapshots of my past wrapping successes work great. I use a corkboard or magnetic board to keep them visible, swapping ideas out as seasons and trends change.
Display Color Palettes and Patterns
I arrange swatches of wrapping paper, ribbons, and tags in complementary colors to create a mini mood board. Seeing different combinations together helps me choose the perfect look for each gift. I also label sections with notes like “birthday,” “holiday,” or “neutral” for quick decision-making.
Incorporate Seasonal and Occasion Themes
I dedicate portions of my board to holiday trends, seasonal motifs, or the vibe of a particular celebration. For Halloween, it’s all about orange and black with spooky prints, while Christmas is filled with reds, greens, and snowflake patterns. Having these themes at a glance keeps my wrapping festive and on point.
Personalize Your Gift Wrapping Station
Making your wrapping station uniquely yours doesn’t just make it more enjoyable to use—it also keeps you inspired for every project. Let’s dive into a few ways to make it both functional and personal.
Decorate with Functional Decor
I like to choose items that double as decorations and useful tools. For instance, a cute wire basket can hold gift bags, while small mason jars are perfect for storing colorful ribbons or tags. Hanging a pegboard above the workstation works wonders too—it keeps tools like scissors and tape dispensers organized while adding a modern, crafty vibe. Another idea is to use festive wrapping paper as a background by framing a few swatches and hanging them like art. This not only ties the space together but also keeps extra bits of paper handy.
Conclusion
Creating a DIY gift wrapping station is such a rewarding project. It’s not just about organization—it’s about making the whole process more enjoyable and stress-free. Having a dedicated space that’s functional and inspiring can completely transform how you approach gift wrapping.
Whether it’s a small corner or a full setup, adding personal touches and thoughtful organization makes all the difference. Plus, it’s a fun way to express your creativity while staying prepared for any occasion. Trust me, once you’ve got your station set up, you’ll wonder how you ever managed without it.
Frequently Asked Questions
Why is having a dedicated gift wrapping station important?
A dedicated gift wrapping station helps keep your supplies organized, saves time, and makes the wrapping process more enjoyable. It prevents messes and ensures easy access to all the materials you need for an efficient and creative wrapping experience.
Where is the best location for a gift wrapping station?
The best location is a practical and accessible spot in your home. Consider unused corners, closet shelves, or a rolling cart. Choose a space that fits seamlessly into your home while providing enough room to work comfortably.
What supplies are essential for a gift wrapping station?
Essential supplies include various wrapping papers for different occasions, ribbons, bows, scissors, tape (regular and double-sided), gift bags, and tools like a tape dispenser or gift-wrap cutter. These basics will cover most wrapping needs with ease.
How can I organize my wrapping supplies effectively?
Use clear storage bins to categorize items by type, such as separating holiday wrapping paper, birthday supplies, and ribbons. Arrange tools like scissors and tape in a desktop caddy and keep wrapping rolls upright for easy reach.
What type of work surface is ideal for a gift wrapping station?
A sturdy table or desk large enough to handle wrapping paper, tools, and gifts is ideal. Repurpose an old desk or folding table for durability and ensure you have enough space to work without feeling cramped.
How can I improve my wrapping station’s comfort?
Add a comfortable chair or stool with good cushioning or lumbar support for longer wrapping sessions. Ensure proper lighting with natural light during the day and a desk lamp or clip-on light for evening work.
What is a wrapping inspiration board, and why is it useful?
A wrapping inspiration board is a visual space to collect ideas for creative gift wrapping. Pin photos of wrapped gifts, swatches of paper, and ribbons to spark new designs. It keeps your wrapping fresh and organized by occasion or season.
How can I personalize my gift wrapping station?
Decorate with functional yet stylish items like cute wire baskets for gift bags or mason jars for ribbons. Use a pegboard for hanging tools and frame festive wrapping paper swatches as decorative art. Personal touches make the space more inviting and inspiring.
Can I create a mobile gift wrapping station?
Yes! Use a rolling cart to store and organize wrapping supplies. It allows you to move your station to different areas of your home, making it a flexible and space-saving option.
Why is good lighting essential for a gift wrapping station?
Good lighting ensures precision, especially when working with small details like tags and bows. Natural light is ideal, but adding a desk lamp or clip-on light helps during evening sessions or in dimly lit areas.