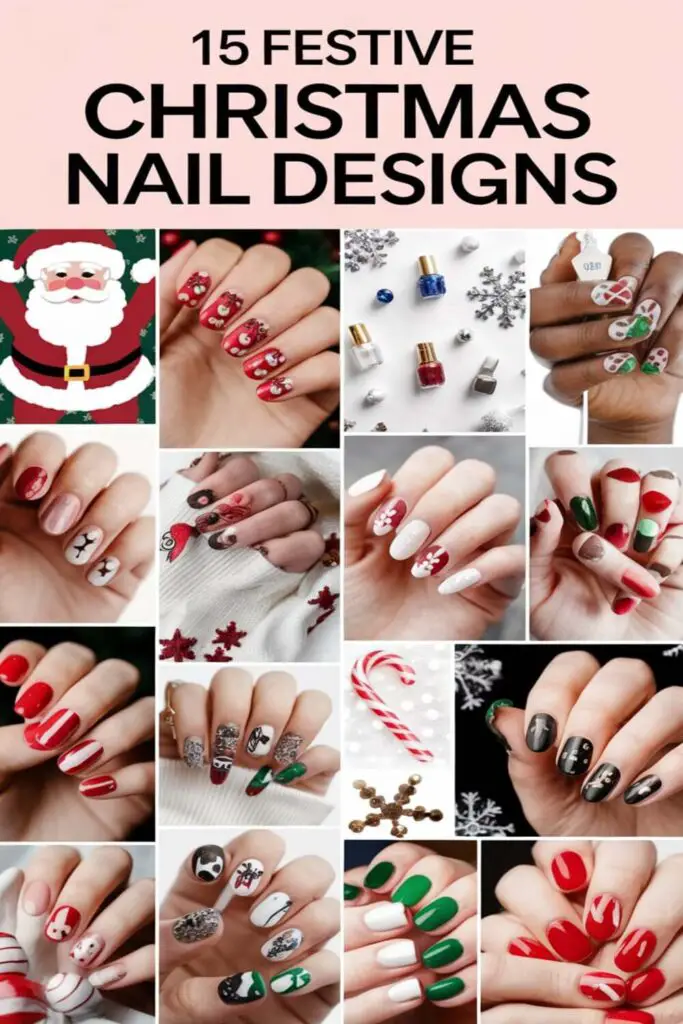
Christmas is right around the corner, and I can already feel the festive vibes in the air. From decorating the tree to sipping hot cocoa by the fire, it’s the perfect time to embrace all things merry and bright. And what better way to get into the holiday spirit than with some stunning Christmas nail designs?
Classic Red And White Candy Cane Stripes
Nothing says Christmas quite like the iconic candy cane pattern. I love how this timeless red-and-white design instantly adds a festive touch to any look.
How To Create Candy Cane Stripes
Start with a white base polish to make the stripes pop. Once it’s dry, use striping tape or a thin nail art brush to create diagonal red lines across each nail. Don’t worry if the lines aren’t perfect—imperfection can add charm! For extra pizzazz, I sometimes sprinkle a little glitter between the stripes or add a glossy top coat for a polished finish.
Sparkling Snowflakes On A Wintery Blue Base
A frosty, blue nail design with delicate white snowflakes is perfect for capturing the magic of winter. This look combines elegance and festive flair for a dreamy Christmas vibe.
Materials Needed For This Look
Here’s what you’ll need to recreate this stunning design:
- Base coat: Keeps nails smooth and helps polish last longer.
- Light blue nail polish: Choose a frosty or metallic shade for the wintery vibe.
- White nail polish: You’ll use this for painting the snowflakes.
- Fine nail art brush or dotting tool: Perfect for intricate details.
- Silver glitter polish or loose glitter: Adds sparkle for that frosty finish.
- Top coat: Seals the design and gives a glossy shine.
- Start simple: Begin with a small “plus” sign, then add diagonal lines to form the snowflake shape.
- Use thin layers: Avoid overly thick polish on the brush to maintain control.
- Work one nail at a time: This prevents the polish from drying before you finish the design.
- Add tiny dots or twinkles: Use your dotting tool to fill empty spots for a magical effect.
- Highlight with glitter: Outline parts of the snowflakes or scatter glitter around them for depth and sparkle.
Glittery Gold And Green Christmas Tree Nails
Nothing says Christmas like a glittering tree. I love this festive nail design because it combines shimmering gold and green with a touch of sparkle that’s perfect for the holiday season.
Step-By-Step Guide To Achieving This Design
- Start with a base coat. Protect your nails and prep them for the glittery magic.
- Apply a green base polish. Choose a rich, deep green for that classic Christmas tree feel. Two coats usually give great coverage.
- Create the tree shape. Use a thin nail art brush or a striping tool to draw a triangle in the center of your nail with gold glitter polish. This will be your Christmas tree.
- Add sparkle. Dot tiny gold or multi-colored glitter at the tips of the tree to mimic ornaments. You can use a dotting tool or the end of a bobby pin for precision.
- Top it off with a star. Stick a small gold nail sticker or use gold polish to draw a star at the top of the tree.
- Seal it all in. Apply a top coat to keep the design smooth and long-lasting.
Chic Matte Red With Gold Accents
Matte red nails are a staple during the holidays, but pairing them with gold accents takes the look to a whole new level. This design is the perfect combination of classic and modern for a festive yet sophisticated vibe.
Why Matte Red Is A Holiday Favorite
Matte red nails scream Christmas. They remind me of everything festive, from Santa’s suit to shiny holiday ornaments. Unlike glossy reds, the matte finish gives a velvety texture that feels cozy and chic at the same time. Plus, it’s versatile—perfect for everything from casual gatherings to formal holiday dinners. A good matte red polish is not only timeless but also adds a bold pop of color that’ll stand out against wintry neutrals.
Adding Gold For An Elegant Twist
Gold accents turn matte red nails into something truly special. Whether it’s a simple gold stripe, a delicate foil detail, or metallic tips, the contrast between red and gold is stunning. I love using gold foil for abstract designs or applying small gold dots along the cuticle line for a minimalist look. For a little more flair, try creating gold snowflakes, stars, or even a single gold nail as an accent. It’s an easy way to elevate your holiday nails while keeping them classy and festive.
Festive Rudolph-Inspired Nail Art
If you’re ready to bring Rudolph to your nails, this design is as adorable as it is festive. From his shiny red nose to his cute antlers, these nails will instantly add holiday cheer to your look.
Tools Required For Character Designs
To create Rudolph-inspired nail art, having the right tools makes all the difference:
- A base coat to protect your nails
- Light brown nail polish for Rudolph’s face
- White, black, and red polishes for details (eyes, nose)
- A dotting tool or toothpick for precise shapes
- A fine nail art brush to draw the antlers
- A glossy or matte top coat, depending on your style
Having these handy will make drawing Rudolph fun and easy.
- Start with a base coat. This prevents staining and helps your design last longer.
- Paint the base color. Apply two coats of light brown polish to create Rudolph’s face. Let it dry completely.
- Draw the nose. Use a dotting tool or toothpick to place a bright red dot at the tip of each nail for Rudolph’s famous nose.
- Add the eyes. Create two small white dots above the nose using a dotting tool. Then, use black polish to add tiny dots inside each white circle for pupils.
- Create the antlers. Use a thin nail art brush to draw two simple antlers extending upward from the top of the face with black polish. Keep the lines fine for a polished look.
- Seal your design. Once everything is dry, apply a top coat for a glossy or velvety matte finish that protects your art.
Timeless French Tips With A Holiday Spin
French tips are classy, but adding a festive twist makes them holiday-ready.
Classic Meets Christmas: Adding Seasonal Colors
Swapping the traditional white tips for seasonal shades like red, green, or glitter instantly transforms this timeless look. I love using metallic gold or silver for an extra glamorous vibe. For a subtle holiday touch, I’ll choose deep red tips paired with a nude or sheer base. Adding tiny details like snowflakes, candy cane stripes, or holly inside the tip area can make the design even more festive. If you’re feeling bold, alternating colors like green and red on each nail gives a fun, playful twist.
Adapting The Design For Different Skill Levels
French tips are super versatile, so they work whether you’re a nail art newbie or a seasoned pro. If you’re just starting, nail guides or pre-made stickers can help create crisp lines. I’ve also used glitter polishes for a forgiving finish—they blur imperfections beautifully. For experienced nail enthusiasts, hand-painting intricate designs like ornaments, stars, or even tiny reindeer over the tips can elevate the look. No matter your skill level, sealing it all with a glossy or matte top coat ensures a polished result that lasts through the holiday season.
Shimmery Ornament-Inspired Nails
Ornament-inspired nails are all about capturing that festive sparkle. They shimmer and shine just like the decorations on your Christmas tree, making them perfect for holiday soirées.
Picking The Right Shade For Ornament Shimmer
Choosing the right shade is key to nailing this look. I like metallic or glitter polishes in classic holiday colors like gold, silver, red, and emerald green. For added depth, you can try a holographic polish that catches the light from every angle. Layering a glitter top coat over a solid base creates that glassy, ornament-like effect.
Cozy Plaid Designs For A Classic Winter Look
Plaid nails are the ultimate cozy style for the holiday season. This timeless pattern brings warmth and charm, making it perfect for winter gatherings.
Guide To Plaid Patterns For Beginners
Starting with plaid nails is simpler than it looks. All you need are a steady hand, striping tape, or a thin brush for clean lines. Begin with a solid base coat in your chosen color and let it dry completely. Then, use a thin brush to create horizontal and vertical lines, crisscrossing them into classic plaid patterns. For beginners, it’s easier to stick with just two or three colors to avoid overwhelming the design. If freehand seems tricky, striping tape can help you create precise and clean lines. The best part? Plaid doesn’t need to be perfect—those small imperfections only add charm.
Frosted Icy Tips For A Snow Queen Vibe
If you’re dreaming of a frosty look that captures the chill and sparkle of winter, icy tips are the way to go. This design is elegant, magical, and perfect for anyone wanting to channel their inner Snow Queen.
Achieving The Frosted Look With Ease
Start with a soft, translucent base coat to create that frosty foundation. I love using sheer whites or pale pearlescent shades for a subtle icy vibe. Once the base layer dries, use a cosmetic sponge to dab shimmery light blue or silver polish onto the tips of your nails. Blend toward the center for a soft gradient effect. Don’t stress about perfection; the charm lies in the wintry, ethereal look. Finally, add a top coat sprinkled with fine silver glitter or holographic flakes to mimic the sparkle of fresh snow.
For a more dramatic twist, try adding snowflake decals or hand-painting them using a white nail polish and a fine detail brush. Start with simple shapes like “X” crosses with added small branches, and don’t forget to add tiny dots around them for a snowy effect.
Best Products For A Shimmering Effect
To nail (pun intended) this design, you’ll need the right products. For the base, I recommend Essie’s “Ballet Slippers” or OPI’s “Funny Bunny” for their soft, sheer finishes. For the frosted tips, Zoya’s “Leia” or China Glaze’s “Ice & Bubbles” add the perfect metallic shimmer. A fine cosmetic sponge works wonders for blending polish, while Born Pretty’s holographic glitter top coat adds that dazzling frosty finish. If you’re hand-painting snowflakes, grab a thin nail art brush and crisp white polish like Sally Hansen’s “White On.”
Stamped Holiday Sweater Pattern Nails
Holiday sweater nails combine cozy vibes with festive flair. Using stamping plates makes this design quick and easy while keeping it super stylish.
Tools Needed For This Stamping Technique
You’ll need a nail stamping kit, which includes plates with sweater patterns, a scraper, and a stamper. Pick a base color—classic red, green, or even white work great—and a contrasting stamping polish, like gold or metallic silver, for bold designs. You’ll also need a base coat, a top coat, and nail polish remover for cleaning plates and tools.
Making Sweater Patterns Look Professional
Start by applying a smooth base coat and two layers of your chosen base color. Let it dry completely before stamping to prevent smudging. Press the stamper onto the plate to pick up the sweater pattern, then carefully transfer it to your nail with a rolling motion. For sharp edges, use tape or a latex barrier around your nails.
Seal the design with a clear top coat to smooth out any ridges and add shine. If you’re aiming for a cozy look, a matte top coat is a great option. Small accents like rhinestones or glitter polish along certain pattern lines can take it to the next level.
Mistletoe And Holly Leaf Accents
Bring a touch of greenery to your holiday nails with delicate mistletoe patterns and textured holly leaves. These designs are festive, elegant, and surprisingly easy to achieve.
Simple Steps To Recreate Mistletoe Art
Start with a light or pastel base, like white or soft pink, to make the mistletoe stand out. Use a fine nail art brush or dotting tool to paint tiny green stems. Add small clusters of round berries using white or red polish for a classic holiday vibe. To keep the design balanced, stick to one or two mistletoe accents per nail or focus on a feature nail. Seal it off with a glossy top coat for a smooth finish.
Adding Texture To Mimic Holly Leaves
For a textured holly leaf design, begin with a festive green base polish. Use a thin detailing brush to outline the spiky edges of the holly leaves in a darker green shade, adding depth. Fill the leaves in with the same darker shade, or layer on a bit of glitter polish for extra dimension. Add bright red dots as berries near the leaves to complete the look. A matte top coat can create a chic, velvety finish, or you can opt for glossy to keep things vibrant.
Adorable Gingerbread Men Nail Designs
Gingerbread men nail art is the perfect way to add a playful and sweet touch to your holiday style. These designs bring the fun of Christmas cookies right to your fingertips!
Painting Mini Gingerbread Man Figures
Creating tiny gingerbread men on my nails is surprisingly easy and so much fun. I start with a neutral or soft brown polish to mimic the color of gingerbread and let it fully dry. Using a dotting tool or thin nail art brush, I draw little outline shapes of gingerbread men with white polish. For their faces and details, I use black and red polish to add eyes, a smile, buttons, and even a tiny bow tie if I’m feeling fancy. A shiny top coat seals in the design and gives it a polished, festive finish.
Complementary Colors For A Sweet Look
Pairing gingerbread men designs with festive colors really pulls the whole look together. I like to use greens, reds, or even sparkly gold as accent nails to make the design pop. Sometimes, I’ll add candy cane stripes or snowflake patterns to a few nails for extra holiday charm. Glittery polish on an accent nail adds sparkle, while a matte finish on others creates an elegant balance.
Ultra Metallic Silver Bells Theme
Silver nails have an unbeatable festive charm, and when paired with a metallic finish, they capture the glimmer and elegance of the holiday season. This design is all about reflective shine and subtle details to highlight the beauty of the silver bells theme.
Polishing Tips For A Reflective Shine
Achieving that high-shine metallic look starts with the right polish. I always recommend using a chrome or mirror-effect silver nail polish for maximum impact. Before applying, prepping your nails is a must—smooth out ridges with a buffing block and use a ridge-filling base coat to create a flawless canvas. When painting, I use thin layers and let each layer dry completely before adding another; this prevents streaks and enhances the reflective effect. To lock in the luster, I finish with a glossy top coat that amplifies the shine and makes the metallic pop.
Incorporating Bell Art Without Overcrowding
Silver bells deserve to be the star of the show, so I like to keep the design minimal yet festive. For a chic look, I’ll paint all nails metallic silver and add tiny bell accents on one or two feature nails. Using a nail art brush or silver nail stickers makes this step easy—small gold bows or white detailing can make the bells look polished and dimensional. To avoid a cluttered look, I space out additional elements like holly leaf decals or glitter, focusing on balance. This keeps the design elegant and sophisticated while honoring the silver bells theme.
Minimalist Starry Night Christmas Nails
I love how minimalist designs capture magic without being over-the-top, and the Starry Night Christmas nails are no exception. With a simple and elegant look, they’re perfect for adding a subtle holiday charm to any outfit.
Why Minimalist Designs Stand Out
Minimalist nail designs are timeless. They offer a clean, sophisticated look that complements any style while still being festive. The beauty of a starry night design lies in its delicate balance—tiny stars and shimmering touches stand out against a dark base without feeling overwhelming. Plus, the simplicity makes it wearable for both casual and formal occasions. It’s ideal for anyone who loves a modern, understated vibe but still wants some holiday sparkle.
Best Practices For A Starry Effect
Start with a deep navy, black, or dark charcoal base polish to mimic the night sky. I find that a rich, glossy finish works best as it enhances the contrast for the stars. Use a dotting tool or a fine nail art brush to add small white or silver dots for stars, focusing on scattering them for a natural cosmic look. To elevate the design, include a few star shapes or use tiny star decals. Add a touch of glitter polish or a subtle shimmer to create that magical glow, like a frosty night.
Keep the design minimal by focusing on one or two accent nails while leaving the others simple, or apply the starry pattern lightly across all nails for a cohesive look. Seal it with a glossy top coat to enhance shine and ensure everything lasts through all your holiday festivities.
Dazzling Multi-Colored Christmas Light Nails
Nothing says Christmas cheer like twinkling lights, and now you can bring that sparkle to your fingertips! A strand of colorful lights makes for a fun and festive nail design that’s perfect for holiday parties.
Creating A Strand Of Lights Design
Start with a neutral or light-colored base, like white or soft beige, to make the lights pop. I use a thin nail art brush or a striping tool to paint a flowing black or dark green line across my nails to resemble the wire. Then, I add evenly spaced small ovals or teardrop shapes along the “wire” using vibrant colors like red, green, blue, and yellow. A dotting tool works perfectly for shaping the bulbs. Finally, to make the design sparkle, I top the bulbs with a layer of glitter polish or a high-gloss top coat.
Conclusion
Christmas is the perfect time to let your creativity shine, and festive nail designs are such a fun way to embrace the holiday spirit. Whether you’re into bold, glittery looks or prefer something more minimal and chic, there’s a design out there that’ll match your vibe.
I love how these nail art ideas can add a little extra magic to the season, whether you’re sipping cocoa by the fire or heading to a holiday party. So grab your favorite polishes, get inspired, and don’t be afraid to experiment. Your nails deserve to join in on the festive fun!
Frequently Asked Questions
1. What are some popular Christmas nail designs discussed in the article?
The article highlights various festive nail designs, including candy cane stripes, sparkling snowflakes, Christmas tree art, matte red with gold accents, Rudolph-inspired designs, holiday sweater patterns, mistletoe and holly accents, gingerbread men, silver bells, minimalist starry night, and multi-colored Christmas light nails. Each design is explained step-by-step.
2. How do I create candy cane nail art for Christmas?
To create candy cane nail art, start with a white base polish. Use striping tape or a thin brush to add diagonal red lines. You can enhance the design with glitter or a glossy top coat for a polished finish.
3. What tools are needed to create snowflake nail art?
For sparkling snowflake nails, you’ll need a base coat, light blue and white polishes, a fine nail art brush or dotting tool, silver glitter polish, and a top coat. These tools help achieve intricate snowflake designs with ease.
4. How can I make Christmas tree nail art look festive?
Start with a green base polish. Use gold glitter to create a triangular tree shape, add colorful dots for ornaments, and top it with a star. Seal with a glossy top coat for a festive, polished look.
5. What makes matte red nails with gold accents special for Christmas?
Matte red nails are a cozy yet chic holiday favorite. Gold accents like stripes, foil, or metallic tips add a luxe touch. With their velvety finish and festive contrast, this design suits both casual and formal occasions.
6. How do I achieve Rudolph-inspired nail art?
Begin with a light brown base for Rudolph’s face. Use a dotting tool and fine brush to add a red nose, black eyes, and antlers. Finish with a top coat for a glossy or matte effect.
7. What is a festive twist on French tips for Christmas?
Swap the classic white tips for red, green, or glitter shades. Add details like snowflakes or candy cane stripes for extra flair. You can use nail guides or freehand the design for a polished holiday twist.
8. What’s the easiest way to create plaid nail art for winter?
Plaid designs are beginner-friendly. Start with a solid base, and use a striping tape or a thin brush to create intersecting lines with two or three complementary colors. Small imperfections add charm to the cozy look.
9. How can I achieve frosted icy nail tips?
Use a translucent base coat and blend shimmery light blue or silver polish onto the tips for a gradient effect. Add snowflake decals or glitter for a magical Snow Queen-inspired look.
10. What are stamped sweater pattern nails, and how do I create them?
Sweater pattern nails mimic cozy knitwear designs. Use a nail stamping kit with festive patterns over a base color. Seal with a top coat and add glitter or rhinestones for an elevated festive vibe.
11. How do I make gingerbread men nail art?
Start with a neutral or soft brown base. Use white polish for outlines and black and red for facial details. Pair the design with festive colors like green or red to complete the holiday look.
12. What’s the best way to create silver bells nail art?
Use a chrome or mirror-effect silver polish over a ridge-filling base for a metallic shine. Add tiny bell accents on feature nails, balancing with minimalistic holly leaves or glitter for a touch of elegance.
13. How do I design minimalist Starry Night Christmas nails?
Apply a deep navy or black base polish. Use a dotting tool to add small stars or a light starry pattern. Keep it simple by focusing on accent nails and finish with a glossy top coat for shine.
14. How can I make Christmas light-inspired nail art?
Start with a neutral or light base. Use a thin brush to paint a flowing line for the wire. Add colorful ovals or teardrop shapes for bulbs, and use glitter or a glossy top coat for added sparkle.