This homemade rustic bread is a simple yet rewarding recipe that yields a crusty loaf with a soft, chewy interior. Perfect for sandwiches or as an accompaniment to soups and salads, this bread is made with basic ingredients and requires minimal effort.
The recipe involves a straightforward process of mixing, kneading, and allowing the dough to rise, making it accessible for bakers of all skill levels.
The Allure of Rustic Bread
Rustic bread holds a special place in the hearts of many food enthusiasts. Its golden-brown crust and soft, airy interior create a delightful contrast that is hard to resist.
This type of bread is not just a staple; it’s a canvas for creativity in the kitchen. Whether enjoyed plain, with a smear of butter, or paired with a bowl of olive oil and herbs, rustic bread elevates any meal.
Its simplicity is part of its charm, making it a perfect choice for both novice and experienced bakers alike. The process of making rustic bread is straightforward, allowing anyone to experience the joy of baking at home.
Ingredients That Matter
The beauty of rustic bread lies in its basic ingredients: flour, water, yeast, and salt. Each component plays a vital role in developing the bread’s unique character.
Using high-quality all-purpose flour can enhance the texture and flavor, while warm water helps activate the yeast, ensuring a good rise.
A pinch of sugar not only feeds the yeast but also contributes to the crust’s beautiful color. The balance of these ingredients is what results in that perfect loaf, making it a rewarding endeavor for any baker.
The Baking Process
Creating a rustic loaf involves a few simple steps, starting with activating the yeast. This crucial step ensures that the yeast is alive and ready to work its magic in the dough.
Once the yeast is frothy, mixing it with the dry ingredients forms a shaggy dough that will soon transform into a beautiful loaf.
Kneading the dough is where the real fun begins. This process develops gluten, giving the bread its structure and chewiness. After kneading, the dough is left to rise, allowing it to double in size and develop flavor.
Shaping and Rising
After the first rise, the dough is punched down and shaped into a loaf. This step is essential for creating the desired form and texture.
Once shaped, the loaf undergoes a second rise, which allows it to become light and airy. This final rise is crucial for achieving that fluffy interior that everyone loves.
While waiting for the dough to rise, preheating the oven is important to ensure a perfect bake. The right temperature helps achieve a crusty exterior while keeping the inside soft and tender.
Baking to Perfection
When the oven is ready, carefully transferring the loaf to the baking surface is key. The sound of the bread baking fills the kitchen with an irresistible aroma.
Baking until golden brown not only creates a beautiful crust but also ensures the bread is cooked through. Tapping the bottom of the loaf for a hollow sound is a classic test for doneness.
Once out of the oven, allowing the bread to cool on a wire rack is essential. This cooling period helps set the crumb and makes slicing easier.
Serving Suggestions
Rustic bread is incredibly versatile and can be served in numerous ways. A simple drizzle of olive oil paired with herbs makes for a delightful dipping experience.
It’s perfect for sandwiches, toast, or simply enjoyed with a bowl of soup or salad. The possibilities are endless, making it a fantastic addition to any meal.
Whether you’re hosting a dinner party or enjoying a quiet meal at home, rustic bread is sure to impress. Its homemade charm and delicious flavor will leave everyone wanting more.
Easy Rustic Bread Recipe
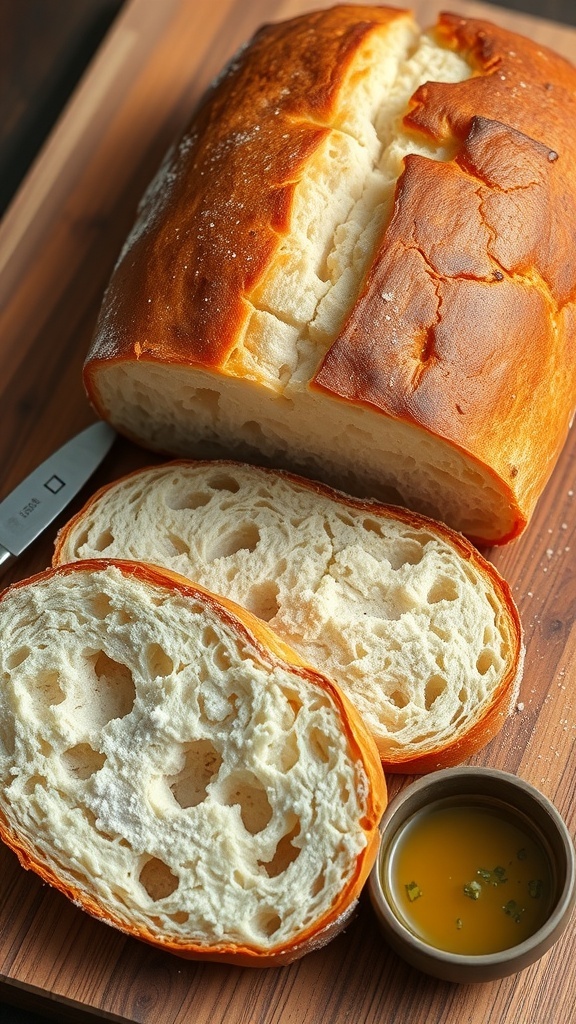
This rustic bread features a blend of flour, water, yeast, and salt, resulting in a deliciously crusty exterior and a tender crumb. The total time for this recipe is about 3 hours, including rising time, and it yields one large loaf.
Ingredients
- 4 cups all-purpose flour
- 1 1/2 teaspoons salt
- 1 teaspoon sugar
- 2 teaspoons active dry yeast
- 1 3/4 cups warm water (about 110°F)
- Extra flour for dusting
Instructions
- Activate Yeast: In a small bowl, combine warm water, sugar, and yeast. Let it sit for about 5-10 minutes until frothy.
- Mix Dry Ingredients: In a large mixing bowl, combine flour and salt.
- Combine Wet and Dry: Pour the yeast mixture into the flour mixture and stir until a shaggy dough forms.
- Knead the Dough: Turn the dough onto a floured surface and knead for about 10 minutes until smooth and elastic.
- First Rise: Place the dough in a lightly greased bowl, cover with a damp cloth, and let it rise in a warm place for about 1-2 hours, or until doubled in size.
- Shape the Loaf: Punch down the risen dough and turn it out onto a floured surface. Shape it into a round or oval loaf.
- Second Rise: Place the shaped loaf on a floured baking sheet or in a proofing basket. Cover and let it rise for another 30-60 minutes.
- Preheat Oven: Preheat your oven to 450°F (230°C). Place a baking stone or an inverted baking sheet inside to heat.
- Bake: Once the oven is hot, carefully transfer the loaf onto the baking stone or sheet. Bake for 25-30 minutes until golden brown and hollow sounding when tapped on the bottom.
- Cool: Remove the bread from the oven and let it cool on a wire rack before slicing.
Cook and Prep Times
- Prep Time: 30 minutes
- Cook Time: 30 minutes
- Total Time: 3 hours
- Servings: 12 slices
- Calories: 120kcal
- Fat: 0.5g
- Protein: 4g
- Carbohydrates: 24g