Dutch braid hairstyles are a popular and stylish choice for various occasions. This technique creates a raised braid that stands out from the hair, giving it a unique and eye-catching appearance.
The Dutch braid is versatile and can be worn in different styles, from casual to formal. It’s a great option for those looking to add a touch of elegance to their hair.
Understanding the Dutch Braid
The Dutch braid is a stunning hairstyle that adds depth and dimension to your look. Unlike traditional braids, this technique involves weaving hair under each section, resulting in a raised appearance that stands out beautifully.
This style is not just visually appealing; it also offers versatility. Whether you’re dressing up for a formal event or keeping it casual, the Dutch braid can be adapted to suit any occasion. Its unique structure makes it a favorite among those who appreciate intricate hairstyles.
Stylish Dutch Braid Techniques
There are numerous ways to wear a Dutch braid. You can opt for a single braid cascading down your back, create playful pigtails, or incorporate the braid into an elegant updo. Each variation showcases the braid’s distinctive 3D effect, making it a captivating choice.
Regardless of your hair type or length, the Dutch braid can be tailored to fit. This adaptability allows anyone to enjoy the beauty of this hairstyle, making it a popular choice for many.
Preparing for the Braid
Before you begin braiding, it’s essential to prepare your hair properly. Start with clean, dry hair to ensure a smooth finish. A good brush or comb will help eliminate any tangles, setting the stage for a flawless braid.
Sectioning your hair into three equal parts at the top of your head is the next step. This organization is key to achieving a neat and structured braid.
The Braiding Process
To create the Dutch braid, start by crossing the right section of hair under the middle section, followed by the left section under the new middle. This technique is what gives the braid its unique raised appearance.
As you continue, remember to add small sections of hair to each outer section before crossing it under the middle. This method not only enhances the braid’s thickness but also ensures a seamless blend with the rest of your hair.
Finishing Touches
Once you reach the nape of your neck, secure the braid with a hair tie. At this point, you can choose to leave the braid as is or gently tug on the edges to create a fuller look.
If you prefer extra hold, a light mist of hair spray can help maintain your style throughout the day. This final touch ensures that your Dutch braid remains as stunning as when you first styled it.
Embracing the Dutch Braid Style
The Dutch braid is not just a hairstyle; it’s a statement. Its intricate weaving and raised structure make it a standout choice for anyone looking to elevate their hair game.
With practice, this technique can become a go-to for various occasions, allowing you to express your personal style effortlessly. Whether you’re attending a casual gathering or a formal event, the Dutch braid is sure to impress.
Stylish Dutch Braid Techniques
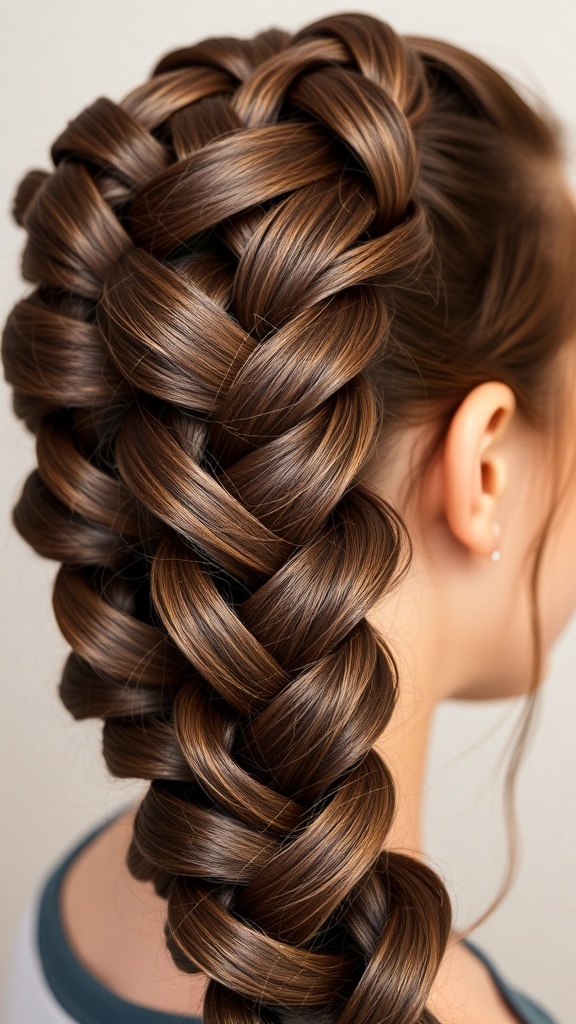
Dutch braids can be worn as a single braid down the back, in pigtails, or incorporated into updos. The process involves crossing sections of hair under each other, creating a 3D effect. This hairstyle is suitable for various hair types and lengths.
Ingredients
- Hairbrush or comb
- Hair ties
- Hair clips (optional)
- Hair spray (optional for hold)
Instructions
- Prep Your Hair: Start with clean, dry hair. Brush out any tangles to ensure smooth braiding.
- Section Your Hair: Divide your hair into three equal sections at the top of your head.
- Begin Braiding: Cross the right section under the middle section, then the left section under the new middle section.
- Add Hair: As you continue braiding, add small sections of hair to each outer section before crossing it under the middle.
- Continue Braiding: Repeat the process until you reach the nape of your neck, then secure the braid with a hair tie.
- Finish the Look: You can leave the braid as is or gently pull on the edges to loosen it for a fuller appearance. Optionally, use hair spray for added hold.
Cook and Prep Times
- Prep Time: 5 minutes
- Braid Time: 10-15 minutes
- Total Time: 15-20 minutes
- Servings: 1 hairstyle
- Maintenance: Regular care for healthy hair