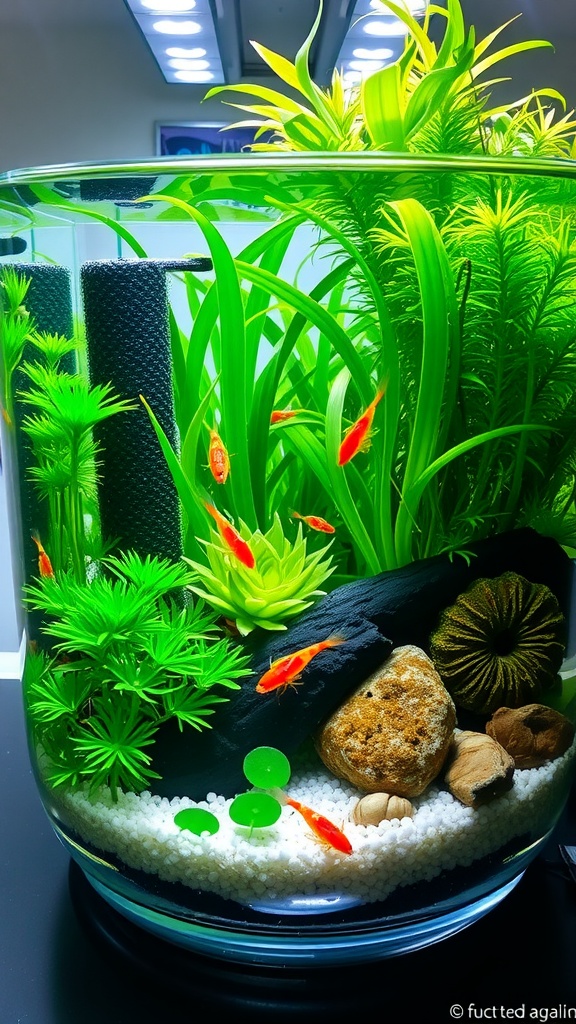
Setting up a 3-gallon shrimp tank can be a rewarding and enjoyable experience for aquarists. Whether you’re a beginner or an experienced hobbyist, this compact aquarium provides an ideal environment for shrimp to thrive and showcase their vibrant colors.
In this guide, we’ll walk you through the essential steps to create a beautiful and healthy shrimp habitat. From selecting the right shrimp species to establishing the perfect water conditions, you’ll discover how to make your shrimp tank a stunning addition to your home.
Creating Your 3-Gallon Shrimp Tank
Setting up a small aquarium can be a delightful task that brings nature into your space. A 3-gallon shrimp tank offers ample opportunity for creativity, showcasing the vibrant colors of shrimp against a backdrop of lush greenery.
The first step involves selecting the right aquarium. Look for one that fits your desired location, ensuring it is stable and secure. This compact size allows for easier maintenance while still providing a beautiful environment for aquatic life.
Choosing the Right Substrate and Plants
The substrate is a vital component of your shrimp habitat. Options like gravel or soil work well, with soil offering additional nutrients for your plants.
Incorporating live aquatic plants such as Java moss or Anubias adds not only beauty but also essential hiding spots for shrimp. Positioning these plants strategically creates a thriving environment that promotes shrimp health.
Setting Up Equipment
Install a sponge filter to maintain gentle water circulation. This type of filter is ideal for shrimp, preventing them from getting sucked into more powerful filters.
Ensure that the tank includes a heater if you live in an area with fluctuating temperatures. Maintaining a stable environment will keep your shrimp happy and active, which is essential for their well-being.
Filling and Cycling the Tank
Once the equipment is in place, slowly fill the tank with dechlorinated water. This step is crucial, as chlorine can harm shrimp and plants alike.
Allow the aquarium to cycle for several weeks. This process establishes beneficial bacteria that help maintain good water quality. Regularly check parameters like pH, ammonia, nitrite, and nitrate during this time to ensure everything is on track.
Introducing Your Shrimp
After the cycling period, it’s time to introduce your shrimp. Acclimate them slowly to help reduce stress. This step is important for preventing shock when moving them into their new home.
Monitor their behavior and health closely in the first few days. A balanced diet and a stable environment will contribute to their longevity and vibrancy.
Maintenance for a Thriving Ecosystem
Regular maintenance is key to keeping your shrimp tank healthy. Perform partial water changes to keep the water quality in check and feed your shrimp a varied diet.
Observing your shrimp and their interactions within the planted environment can be rewarding. With proper care, your aquarium will flourish, becoming a stunning focal point in your home.
Your Guide to a Successful Shrimp Aquarium

A well-planned 3-gallon shrimp tank is a captivating aquatic ecosystem filled with lively shrimp and lush plants. With careful attention to water quality and habitat setup, you can create a miniature paradise for your shrimp that not only looks beautiful but also promotes their well-being.
Ingredients
- 3-gallon aquarium
- Aquarium substrate (gravel or soil)
- Live aquatic plants (like Java moss or Anubias)
- Shrimp (such as Cherry shrimp or Ghost shrimp)
- Aquarium heater (if needed)
- Filter (preferably a sponge filter for safety)
- Water conditioner
- Test kits for pH, ammonia, nitrite, and nitrate
- Decor and hiding spots (rocks, driftwood, or ceramic caves)
Instructions
- Rinse the aquarium: Thoroughly clean the tank with water (avoid soap) and set it up on a stable surface.
- Add substrate: Pour the substrate into the tank, creating a slope for aesthetics and better water flow.
- Plant live plants: Position the plants in the substrate to create hiding spots and greenery for the shrimp.
- Install the filter: Set up a sponge filter to ensure gentle water circulation and filtration.
- Fill with water: Slowly fill the tank with dechlorinated water, ensuring the plants settle in place.
- Cycle the tank: Allow the tank to cycle for a few weeks before introducing shrimp. Monitor water parameters during this period.
- Introduce shrimp: Once the tank is cycled, slowly acclimate your shrimp to the new environment and release them.
- Maintain your tank: Regularly check water parameters, perform partial water changes, and feed your shrimp a balanced diet.
Cook and Prep Times
- Prep Time: 1 hour
- Cycle Time: 1-4 weeks
- Total Time: Varies
- Servings: N/A
- Calories: N/A
- Fat: N/A
- Protein: N/A
- Carbohydrates: N/A