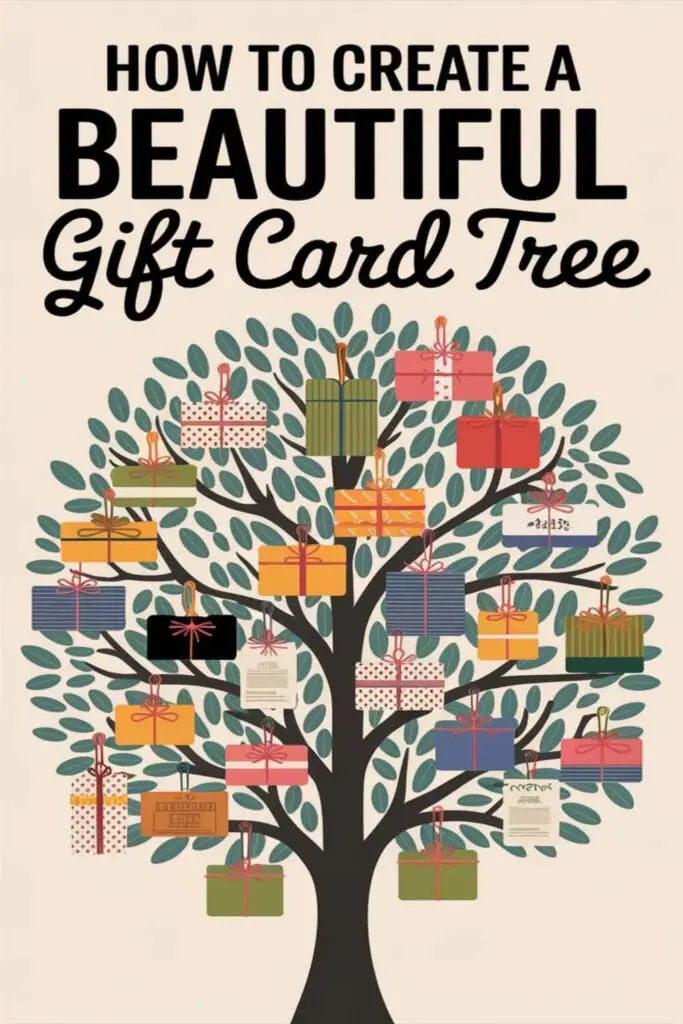
Gift cards are such a versatile and thoughtful gift, but let’s be honest—they can feel a little plain on their own. That’s why I love the idea of turning them into something visually stunning, like a gift card tree. It’s a creative way to present multiple cards while adding a personal, handmade touch that’s sure to impress.
Gather Your Materials
Creating a gift card tree is easier when you have everything ready to go. Here’s what you’ll need to make it both functional and beautiful.
Select a Sturdy Base for the Tree
Pick a base that can support the weight of your gift cards without tipping over. A small potted plant, a foam cone, or even a heavy vase can work perfectly. If you’re using a pot or vase, fill it with rocks, sand, or floral foam to keep it stable.
Choose the Right Gift Cards
Use a mix of gift cards that fit the theme or preferences of the recipient. For example, include cards for their favorite coffee shop, clothing store, or online retailer. Stick to lightweight cards so they don’t bend the branches or decorations.
Collect Decorative Accessories
Grab some ribbon, mini clothespins, or ornament hooks to attach the gift cards to the “tree.” Add flair with string lights, small ornaments, or faux flowers. These accessories make everything pop and give your gift card tree a polished look.
Plan the Design
Creating a beautiful gift card tree starts with thoughtful planning. A well-designed tree will feel cohesive and eye-catching, making it a memorable centerpiece.
Decide on a Theme or Color Scheme
Pick a theme or color scheme that suits the occasion or the recipient’s personality. For example, you could choose a festive holiday theme with red and green, a playful birthday vibe with bright colors, or something elegant with metallic tones like gold or silver. Consistency in colors and materials will tie the entire tree together.
Sketch Out the Layout
Draw a rough sketch of how you want the gift card tree to look. Decide where the gift cards will hang, how ribbons or string lights will be placed, and what decorations will fill any gaps. This will give you a clear visual guide and help you avoid a cluttered or uneven presentation.
Determine the Height and Size
Decide how tall and wide the tree should be based on where it will be displayed. If it’s going on a tabletop, keep it compact and proportional, around 12–18 inches tall. For a larger display, consider a tree that’s around 24–36 inches tall. Make sure it’s sturdy enough to support the number of cards and decorations you plan to add.
Assemble the Tree Structure
Creating a strong and visually appealing tree structure is key to showcasing your gift cards beautifully. Here’s how I like to bring it all together:
Build or Purchase a Tree Frame
I start by either building a tree frame or purchasing a pre-made one. If I’m building, a simple cone-shaped frame using wire or sturdy sticks works great. For a ready-made option, tabletop metal or wooden tree frames are perfect. They offer a clean starting point and come in various sizes.
Attach and Secure Branches
Next, I attach branches or flexible twigs to the frame. Lightweight options like artificial branches or decor stems are easy to reshape and secure. I use floral wire or strong tape to fasten them tightly to the frame, making sure there are enough branches to hang the gift cards evenly.
Decorate the Tree
Once the frame is ready, it’s time to make your gift card tree truly stand out. Let’s add some flair and personality with lights, ornaments, and more.
Add Lights and Ornaments
Wrap string lights around the branches to create a warm, inviting glow. I prefer battery-operated lights because they’re easy to manage and don’t need an outlet. Add a mix of small ornaments, such as miniature baubles, snowflakes, or stars, to enhance the theme. For a festive vibe, I like sticking to metallics or traditional holiday colors. Make sure everything is evenly spaced for a balanced appearance.
Attach Gift Cards with Clips or Hooks
Secure each gift card using mini clothespins, S-hooks, or small ornament hangers. I’ve found clothespins to be super easy to use and they add a cute, rustic feel. Position the gift cards strategically to avoid overcrowding any one area. Placing them at varied heights makes the display look dynamic and visually appealing.
Personalize the Gift Cards
Giving the gift cards a personal touch makes the tree even more meaningful. It’s an easy way to show thoughtfulness and make each card feel special.
Write Personalized Messages
Adding a short, heartfelt note to each gift card makes it unique. I like to jot down why I picked the card or a message of encouragement. For example, for a coffee gift card, I might write, “For those mornings you need an extra boost!” Use a metallic marker or decorative pen to make it stand out.
Use Custom Gift Card Holders
Custom holders can reflect the theme of the tree or the recipient’s personality. I love using DIY options like colorful envelopes, kraft paper sleeves, or even small fabric pouches. You could decorate them with stickers, stamps, or washi tape for some flair. If you’re not a DIY fan, pre-made decorative holders are a great alternative.
Add Small Tokens or Notes
Including tiny extras with the cards adds a charming touch. I’ve attached items like keychains, mini photos, or handwritten quotes that complement the gift card’s theme. For instance, a bookshop card could include a cute bookmark. These small details make the presentation feel personal and fun.
Present the Gift Card Tree
Once you’ve brought your gift card tree to life, it’s time to display and share it in all its glory. Here’s how to present it in the best possible way.
Choose a Display Spot
Pick a location where the tree can shine but won’t be in the way. I usually go for a sturdy tabletop, a mantel, or even a well-lit corner. Make sure the spot complements the tree’s theme—an elegant tree looks stunning on a sleek marble countertop, while a festive one might fit perfectly next to a holiday centerpiece. If you’ll have guests or the recipient over, keep it at eye level so it grabs attention effortlessly.
Include Instructions for Recipients
Add a small sign or card telling the recipient how to “pick” their gift cards. I like to keep it simple—something like, “Grab your favorite card or open each in a specific order!” If you’ve added quirky holders, explain their purpose too. Personal instructions make the tree feel even more thoughtful and fun to interact with.
Capture and Share Photos
A gorgeous gift card tree deserves to be shown off! Snap some photos once everything’s in place. I always take pictures from different angles to capture all the details—like how the lights sparkle or how the decorations add personality. You can share the tree on social media or keep the photos as a memory. If it’s for a group, take a final shot after everyone has picked their cards—it’s a fun way to document the experience.
Conclusion
Creating a gift card tree is such a fun and thoughtful way to elevate a simple gift into something truly memorable. It’s a chance to get creative, show off your personal touch, and make the recipient feel extra special. Plus, it doubles as a beautiful centerpiece that’s sure to impress.
Whether you’re crafting one for the holidays, a birthday, or any special occasion, the effort you put into designing and decorating it will definitely shine through. It’s not just about the gift cards—it’s about the experience and the joy it brings.
Frequently Asked Questions
What is a gift card tree?
A gift card tree is a creative and decorative way to present multiple gift cards. It uses a tree-like structure to display the cards, along with added decorations like lights, ribbons, and ornaments for a festive and personalized touch.
What materials do I need to create a gift card tree?
You’ll need a sturdy base (like a potted plant or vase), gift cards, lightweight branches or twigs, floral wire or tape, mini clothespins or hooks, string lights, ribbons, and small decorative ornaments.
How do I make the gift card tree sturdy?
To make it sturdy, use a stable base, such as a weighted pot or heavy vase. Ensure the frame and branches are securely attached using floral wire or strong tape.
Can I personalize the gift card tree?
Yes, you can personalize it with custom gift card holders, heartfelt messages, small tokens like keychains or bookmarks, and a theme that matches the recipient’s personality or occasion.
How do I arrange the gift cards on the tree?
Use mini clothespins, S-hooks, or ornament hangers to attach the cards. Place them at varied heights and evenly distribute them for a balanced and eye-catching display.
What decorations should I use for the gift card tree?
Decorations can include string lights, ribbons, small ornaments, mini baubles, and theme-specific accents. Choose colors or designs that enhance the tree’s theme and occasion.
How do I choose a theme for my gift card tree?
Select a theme based on the recipient or the occasion, such as a holiday theme, a rustic look, or an elegant metallic color palette. Plan the layout and colors to align with the theme.
Where should I display the gift card tree?
Display it on a sturdy tabletop or well-lit corner for maximum impact. Place it at eye level to make it easily visible and accessible for the recipient.
How can I make the presentation more interactive?
Include instructions on how the recipient can “pick” their gift cards from the tree. This adds a fun, interactive element to the gift-giving experience.
Can I reuse a gift card tree frame?
Yes, you can reuse the frame for future occasions. Simply change the decorations and theme to suit the new event or recipient’s preferences.