There’s something so special about giving a handmade gift. It’s not just the item itself—it’s the thought, time, and love that go into creating something unique. Whenever I make a DIY present, it feels more personal, like I’m sharing a little piece of myself with the person I’m gifting it to.
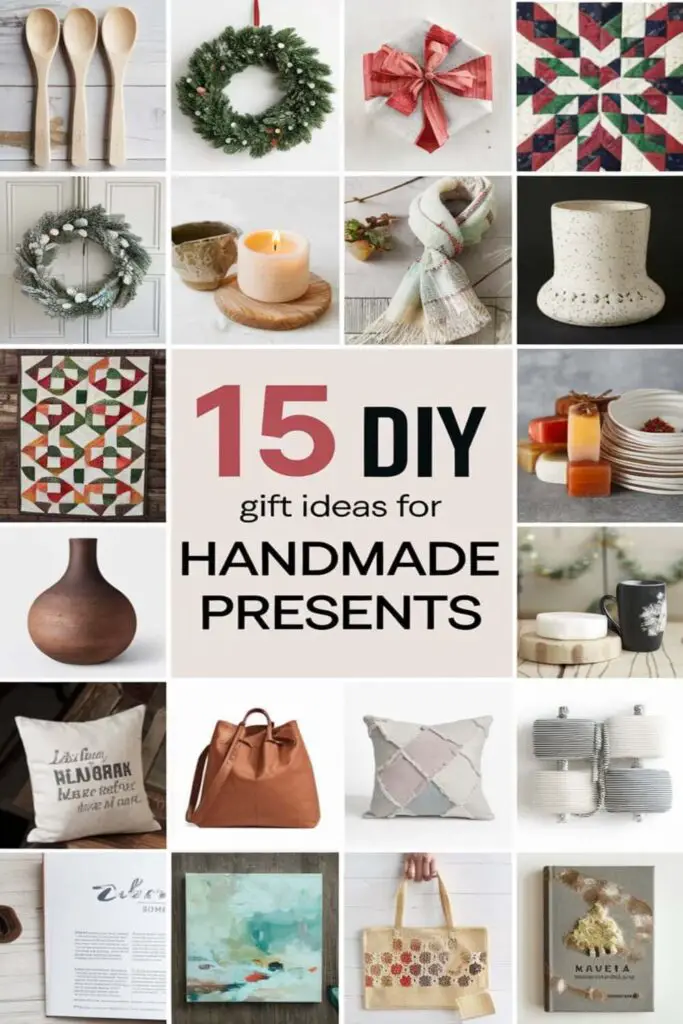
Store-bought gifts are great, but there’s a charm to handmade presents that you just can’t replicate. Whether it’s for a birthday, holiday, or just because, crafting something with your own hands makes the gesture feel extra meaningful. Plus, it’s a fun way to get creative and maybe even save a little money.
Personalized Photo Frames
When it comes to heartfelt DIY gifts, personalized photo frames are always a hit. They’re easy to make and hold sentimental value, making them perfect for any occasion.
Materials Needed for DIY Photo Frames
I usually gather a mix of budget-friendly and basic materials to get started. Here’s what I use:
- Plain frames: Wood or plastic frames from craft stores work best.
- Paints: Acrylic paints in your favorite colors.
- Decorative items: Think washi tape, glitter, stickers, or pressed flowers.
- Glue or Mod Podge: For attaching decorations and sealing the final design.
- Photos: Choose memorable pictures that’ll suit the receiver’s taste.
- Brushes and markers: For painting and adding handwritten messages or designs.
Having these materials on hand keeps the process simple and fun.
Creative Photo Frame Decoration Tips
Personalizing the frame is where the magic happens. Here’s what I love doing to bring out creativity:
- Paint patterns: Create geometric designs, ombre fades, or even freehand doodles with paint.
- Use natural elements: Add a rustic touch by gluing on twigs, seashells, or dried leaves.
- Incorporate names or dates: Add the recipient’s name or a special date using paint or letter stickers.
- Create themes: Match the frame’s design to an event, such as adding glitter for a wedding photo or stars for a graduation shot.
- Layer accessories: Experiment with ribbons, buttons, or fabric scraps for a textured look.
Homemade Aromatherapy Candles
Making aromatherapy candles at home is a thoughtful way to combine creativity and relaxation. These handcrafted gifts are perfect for anyone who enjoys calming scents and a cozy atmosphere.
Essential Oils for Relaxing Scents
Choosing the right essential oils makes all the difference. Lavender is my go-to for promoting relaxation, while eucalyptus works wonders for a refreshing vibe. If your recipient enjoys sweet, comforting aromas, try vanilla or cinnamon. For an uplifting mood, citrus oils like orange or bergamot are fantastic. To make it unique, you can even blend oils like rosemary and peppermint for a spa-like feel.
- Gather materials: You’ll need wax (soy or beeswax works best), wicks, a heat-safe container, essential oils, and a double boiler or microwave-safe bowl.
- Prepare the wick: Attach the wick to the center of your container using a glue dot or wick sticker.
- Melt the wax: Use a double boiler or microwave in small increments. Stir frequently until fully melted.
- Add essential oils: Stir in 20–30 drops of your chosen oils per cup of wax for a noticeable scent.
- Pour the wax: Carefully pour the melted wax into the container, holding the wick upright.
- Set the candle: Let it cool and solidify at room temperature, trimming the wick to about 1/4 inch before gifting.
These candles are easy to customize with decorative jars, dried flowers, or even hand-painted containers. It’s an inexpensive yet heartfelt DIY project that’ll shine as the perfect handmade present.
DIY Knitted Scarves
Knitted scarves are a classic handmade gift that’s both cozy and stylish. They’re perfect for anyone on your list and can be customized in color, pattern, and size.
Knitting Materials You’ll Need
To start, you’ll need knitting needles and yarn. I recommend size 8 or 9 needles for beginners since they’re easy to handle. For yarn, choose a soft, medium-weight option like acrylic or wool blends. You’ll also want a pair of scissors, a tape measure, and a yarn needle for finishing your scarf. If you’re using a pattern, grab that too. Most of these materials are inexpensive and easy to find at craft stores or online.
Easy Patterns for Beginners
If you’re new to knitting, simple patterns are the way to go. The garter stitch pattern is perfect for beginners, as it only requires the basic knit stitch. Another great option is the ribbed pattern, which alternates knit and purl stitches for a stretchy, textured design. I also love the seed stitch, which creates a bumpy, unique texture. These patterns let you practice basic techniques while creating a scarf that looks amazing and feels special.
Handmade Soap Bars
Homemade soap bars make a thoughtful and practical gift that’s perfect for any occasion. They’re easy to customize with scents, colors, and designs, letting you create a truly personal present.
Ingredients for DIY Soap
To make soap, you’ll need a few basic supplies that are easy to find. I use a soap base, like glycerin or shea butter, because it saves time and effort. Essential oils are a must for adding fragrance—lavender, peppermint, and citrus are some of my favorites. For colors, I love using natural pigments like mica powders. Finally, adding dried flowers, like lavender buds or rose petals, gives the soaps a luxurious touch. Silicone molds are also essential for shaping the bars into the perfect size and style.
Unique Soap Designs to Try
Trying different designs makes the soap even more special. I like layering multiple colors in the mold to create ombré effects or swirling contrasting hues for a marbled look. Embedding dried botanicals, like chamomile or calendula flowers, adds texture and elegance. For a whimsical touch, I sometimes include small toy figures or colorful embeds in transparent soap bases. Using seasonal themes, like red and green for Christmas or pastel shades for spring, also makes these bars festive and fun to gift.
Painted Mason Jars
Painted mason jars are a versatile and charming gift idea that can be easily customized for any occasion. They’re perfect for adding a handmade, rustic touch to your gift-giving.
Tools for Mason Jar Crafting
I always gather a few simple tools before starting to craft painted mason jars. You’ll need mason jars in your desired size, acrylic paints or spray paints, and a set of paintbrushes in varying sizes. Painter’s tape is great for creating clean lines or patterns, while stencils can help with intricate designs. Sandpaper can give your jars a distressed look, and sealing spray ensures the paint stays durable. Don’t forget some newspaper or a drop cloth to protect your workspace!
Customized Tote Bags
Customized tote bags are practical, eco-friendly, and make fantastic DIY gifts. With just a few supplies and a little creativity, you can design a tote that’s truly one-of-a-kind.
Materials for Personalizing Tote Bags
I start with a plain canvas tote bag as the base. Other essential materials include fabric paints, permanent markers, iron-on patches, fabric stencils, and a good set of paintbrushes. If I’m using heat transfer vinyl, I grab a cutting machine (or scissors) and an iron. For an extra touch, I like to keep embellishments like buttons, sequins, or ribbons handy. You can find most of these supplies online or at craft stores without breaking the bank.
Creative Design Ideas for Tote Bags
I love experimenting with typography by painting inspiring quotes or the recipient’s name in fun fonts. Stencils make it super easy to create neat geometric shapes, floral patterns, or even holiday-themed designs. Sometimes, I freehand a design using fabric markers for a more personal look. If I want a textured vibe, I sew on decorative patches or add stitched details. For those with artistic flair, painting a landscape or abstract art can turn a plain tote into a functional masterpiece. Whatever the theme, the personalization makes it a thoughtful and practical gift.
DIY Jewelry Pieces
Handmade jewelry is always a thoughtful and stylish gift. From necklaces to bracelets, crafting your own pieces adds a personal touch that store-bought items just can’t match.
Tools for Making Jewelry
Having the right tools makes all the difference in DIY jewelry projects. I recommend starting with a basic jewelry-making kit, which usually includes wire cutters, pliers (needle-nose, round-nose, and flat-nose), and a bead organizer. If you’re working with beads, grab some stretch cords, jewelry wire, and crimp beads too. For extra flair, you can collect charms, jump rings, and clasps. Affordable options are available at most craft stores, so you don’t need to break the bank to get started.
Simple Necklace and Bracelet Tutorials
Creating necklaces and bracelets is easier than it seems. For a simple necklace, I like to thread beads of varying sizes and colors onto a jewelry wire, adding a charm or pendant for a centerpiece. Loop the ends with round-nose pliers, attach a clasp, and you’re done!
For bracelets, stretchy designs are perfect for beginners. String beads onto an elastic cord, tie a secure knot, and dab it with clear nail polish for durability. For a braided leather bracelet, cut three leather cords, braid them together, and add a clasp at both ends. These quick projects are beginner-friendly and make beautiful handmade gifts.
Hand-Decorated Coasters
Hand-decorated coasters make for a practical yet creative gift that anyone can appreciate. They’re easy to customize and perfect for adding a personal touch to someone’s home.
Materials for Personalized Coasters
To start, you’ll need basic ceramic or cork coasters as your base. I also recommend grabbing acrylic paints, paint markers, or alcohol inks for decorating. Don’t forget a clear sealant or resin to protect your designs. If you’re into decoupage, you’ll need decorative paper or napkins, as well as Mod Podge to apply them. Other handy items include masking tape for clean lines, small sponges for blending colors, and stencils for intricate patterns.
Fun Designs and Patterns to Try
When it comes to designs, you can go as bold or minimal as you’d like. I love painting geometric shapes with bright colors for a modern vibe. Floral patterns are another favorite—they add a soft, elegant touch. If you want something artsy, try using alcohol inks to create marble or watercolor effects; they turn out stunning. Personalizing coasters with names, initials, or short quotes makes the gift even more meaningful. For an extra-special touch, you can use metallic paint or gold leaf to add some shimmer to your designs.
Herb Garden Kits
Herb garden kits are a perfect DIY gift for anyone who loves cooking, gardening, or fresh herbs. They’re thoughtful, easy to make, and bring a touch of green into the recipient’s home.
Supplies for DIY Herb Kits
I like to start with small, biodegradable pots or mason jars as planters. For the soil, I usually grab a good-quality potting mix that’s suitable for herbs. Don’t forget the seeds! Popular choices include basil, parsley, cilantro, thyme, or mint. Adding some small plant markers or wooden tags for labeling makes it more organized. If you want to go the extra mile, include a tiny watering can or spray bottle for care.
Tips for Packaging Herb Garden Kits
When it comes to packaging, I love using eco-friendly materials like kraft paper or burlap to tie everything together neatly. Wrapping the pots in twine or raffia gives them a rustic, handmade touch. Adding a care instruction card is key—it’s always a nice gesture to include planting tips and watering guidance. You could even write a small note or decorate the packaging with dried flowers to make it extra special.
Embroidered Wall Art
Creating embroidered wall art is a relaxing way to craft a gift that’s full of personality. It’s perfect for adding a customized, handmade touch to any space!
Beginner Embroidery Tools
Starting with embroidery is easier than you might think. You’ll need an embroidery hoop (a 6-inch hoop is great for beginners), embroidery needles, colorful embroidery floss, and fabric like cotton or linen. I always recommend getting scissors with precise tips for trimming threads and a water-soluble marking pen for sketching designs. Most of these can be found at your local craft store or online kits.
Easy Patterns for Handmade Wall Decor
If you’re new to embroidery, simple patterns can help you build confidence while making something beautiful. Think floral motifs, geometric shapes, or basic text quotes like “Home Sweet Home.” I’ve found free designs online, or you can trace your own sketches onto fabric. Stick to stitches like backstitch, split stitch, or the satin stitch to keep things manageable. Once finished, frame the embroidery in its hoop and trim the edges for a gift-ready piece that’s both functional and artistic.
Flavored Oil and Vinegar Bottles
Flavored oil and vinegar bottles make elegant and useful DIY gifts, especially for cooking enthusiasts. They’re easy to create and can be personalized with unique flavors and attractive packaging.
Recipes for Infused Oils and Vinegars
Choosing the right ingredients is key to crafting infused oils and vinegars. For oils, I like using olive oil as a base and pairing it with ingredients like rosemary, garlic, chili peppers, or lemon zest for diverse flavors. Vinegars work wonderfully with white wine or apple cider bases, infused with herbs like thyme or basil, or fruits such as raspberries or orange peel.
To make them, I heat the oil gently with my chosen ingredients for about 10-15 minutes, ensuring the flavors blend. For vinegar, I let the ingredients steep in the liquid in a sealed jar for 1-2 weeks, shaking it gently every few days. Once infused, I strain the liquid to remove solids, keeping the oils and vinegars smooth and ready to use.
Stylish Presentation Ideas
The presentation elevates these gifts from simple to stunning. I use glass bottles with corks or swing tops for a polished look. Adding labels is an easy way to list the flavors or provide serving suggestions. For a decorative touch, I sometimes include sprigs of fresh herbs, dried chili, or citrus peels inside the bottles—it looks beautiful and highlights the flavor blend.
Tying a ribbon or twine around the bottle neck adds a rustic charm, and attaching a small recipe card makes it extra thoughtful. Placing the bottles in a basket with other homemade items, like bread or pasta, creates a complete gourmet gift.
DIY Coffee Mug Designs
Creating custom coffee mugs is a fun and practical gift idea that adds a personal touch to every sip. With the right supplies and techniques, you can make stunning designs that last for years.
Supplies for Customizing Coffee Mugs
I always start with plain ceramic mugs as a blank canvas. For decorating, I use oil-based paint markers, porcelain paints, or vinyl decals depending on the design I’m going for. Painter’s tape comes in handy for creating clean lines or blocking off areas, while stencils are perfect for intricate patterns. To ensure the designs stay vivid, I also need an oven for curing the paint and a soft cloth for cleaning the mugs beforehand.
How to Create Long-Lasting Designs
I clean the mug’s surface with rubbing alcohol to remove any oils or dirt before starting. Freehand designs or stencils work perfectly with oil-based paint markers, letting me draw patterns, quotes, or custom artwork. After finishing my creation, I let it air dry for 24 hours and then bake the mug in the oven at 350°F for about 30 minutes. This helps the paint set so it won’t chip or wash off easily. If I’m using vinyl decals, I seal them with dishwasher-safe Mod Podge for durability.
Homemade Bath Bombs
Who doesn’t love a relaxing soak in the tub? Homemade bath bombs are a delightful and customizable gift that anyone can enjoy, perfect for creating a spa-like experience at home.
Key Ingredients for DIY Bath Bombs
Crafting bath bombs requires just a few simple ingredients. I always start with baking soda (1 cup) and citric acid (1/2 cup) as the main base—this combo creates the fizzy effect when dropped in water. Cornstarch (1/2 cup) helps bind the bomb and prolongs the fizz, while Epsom salt (1/2 cup) adds a soothing touch for aching muscles. For hydration, I add 2-3 teaspoons of carrier oil like coconut, almond, or jojoba oil. A splash of water or witch hazel (in a spray bottle) helps hold everything together. To make them extra special, I include a few drops of essential oils, like lavender for relaxation or peppermint for a refreshing feel, and natural pigments or mica powder for color. Optional dried botanicals like rose petals or lavender buds give the bath bombs an elegant, spa-like vibe.
Personalized Fabric Keychains
Personalized fabric keychains are a fun, simple gift idea that adds charm and thoughtfulness to everyday items. They’re easy to make and a great way to use up leftover fabric from other projects.
Materials for Handmade Keychains
I usually start by gathering basic materials to keep things organized. You’ll need fabric scraps (cotton works best), fusible interfacing for durability, a sewing machine or needle and thread, keyring hardware, and fabric scissors. For customization, grab craft paint, fabric markers, or embroidery floss to add unique touches like initials or small designs. If you want a polished look, optional items like pinking shears, measuring tape, or an iron can be helpful.
Easy Tutorials for Beginners
Making these keychains is surprisingly straightforward, even if you’re not super crafty. First, cut two pieces of fabric into identical shapes, like rectangles or hearts, and fuse them with interfacing for sturdiness. Next, sew around the edges, leaving space at the top for the keyring loop. Attach the keyring hardware securely by folding the fabric over and stitching it in place.
DIY Photo Albums
Making a photo album by hand is one of the most heartfelt ways to preserve memories. It’s a meaningful gift that feels personal, thoughtful, and unique.
Tools for Crafting Meaningful Albums
I always start by gathering a few essential supplies to make the process smooth. You’ll need a sturdy blank scrapbook or binder, high-quality cardstock or decorative paper, and your favorite photos printed and ready to go. For decoration, grab some stickers, washi tape, stencils, and colored pens or markers. A good pair of scissors, a precision craft knife, and a glue stick or double-sided tape are also must-haves. If you want an extra polished look, a corner rounder punch works wonders to refine photo edges.
Creative Ideas for Personalization
To make a truly unique photo album, I like to add personal touches that reflect the recipient or the shared moments. You can use themed pages to match specific memories, like a travel map background for vacation photos or floral prints for special occasions. Handwriting captions or dates keeps it personal, or you can use printed text for a sleeker style. Layering elements like ticket stubs, pressed flowers, or handwritten notes alongside photos adds depth. For an interactive touch, consider adding pockets or envelopes for keepsakes like letters or small mementos. Use ribbons, dried leaves, or even a metallic pen for titles to give your gift that extra charm.
Conclusion
Making handmade gifts is such a rewarding experience. Not only do you get to flex your creativity but you also create something truly unique and meaningful for the people you care about. There’s just something special about giving a gift that’s made with love and thought.
Whether you’re crafting for a holiday, birthday, or just because, these DIY ideas are a great way to show someone how much they mean to you. Plus, it’s a fun way to spend your time and maybe even pick up a new hobby along the way. So grab your supplies and start creating—you’ve got this!
Frequently Asked Questions
Why are handmade gifts more meaningful than store-bought ones?
Handmade gifts are more meaningful because they reflect the time, effort, and thought invested in creating them. They carry a personal touch, making them unique and heartfelt for the recipient.
What are some easy handmade gift ideas for beginners?
Some simple DIY gift ideas include painted mason jars, custom tote bags, embroidered wall art, or personalized keychains. These projects require basic materials and are beginner-friendly.
How can I personalize a DIY gift?
You can personalize DIY gifts by adding names, dates, meaningful quotes, or themed designs. Custom decorations and using the recipient’s favorite colors or patterns also make gifts unique.
What materials do I need for a homemade photo frame?
Materials for crafting a personalized photo frame include a plain frame, acrylic paints, decorative items (e.g., buttons, glitter), memorable photos, and glue.
Are DIY gifts cost-effective?
Yes, DIY gifts are usually budget-friendly and save money compared to store-bought options. They allow you to use materials you may already have at home.
What essential oils are best for homemade candles?
Popular essential oils for homemade candles include lavender (relaxation), eucalyptus (refreshment), and citrus oils (uplifting mood). Choose scents based on the recipient’s preference.
Can I make handmade gifts without any craft experience?
Absolutely! Many DIY projects, like creating bath bombs, painted mugs, or simple knitted scarves, require basic materials and easy-to-follow instructions, making them perfect for beginners.
How do I make personalized fabric keychains?
To create fabric keychains, use fabric scraps, fusible interfacing, keyring hardware, and tools like fabric paint or markers. Cut, sew, and customize the design for a unique gift.
What are some creative ideas for decorating mason jars?
Decorate mason jars with acrylic paints, stencils, glitter, or distressing techniques. Use natural embellishments like ribbons or dried flowers to add a rustic touch.
What are the benefits of gifting herb garden kits?
Herb garden kits are eco-friendly and practical gifts, perfect for cooking or gardening enthusiasts. They promote sustainability and can be personalized with decorative packaging.
How can I make a DIY knitted scarf for a gift?
For a beginner-friendly knitted scarf, use size 8 or 9 needles with soft, medium-weight yarn. Start with a simple pattern like the garter stitch for a cozy and stylish gift.
What makes homemade bath bombs unique gifts?
Homemade bath bombs are customizable with different scents, colors, and shapes. Adding dried botanicals or essential oils creates a spa-like experience, making them thoughtful gifts.
How can I design custom coffee mugs at home?
To personalize coffee mugs, use oil-based paint markers or porcelain paints. Create your design, cure it in the oven, and ensure it’s dishwasher-safe for long-lasting results.
Are DIY photo albums good for special occasions?
Yes, DIY photo albums are perfect for preserving memories. Personalize them using themed pages, handwritten captions, or pockets for keepsakes, making them heartfelt for any occasion.
What tools are needed for creating DIY jewelry?
Essential tools for making DIY jewelry include jewelry pliers, beads, wire, and clasps. With these, you can craft necklaces, bracelets, or earrings easily and creatively.